- Category
- Practical craft lessons
- Reading time
- 7 min.
- Sources
- Source-based lesson with original teaching diagrams
Separate construction from decoration
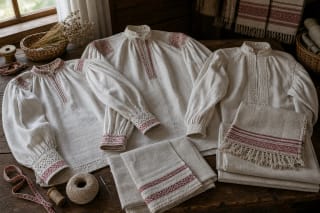
Choose a shirt image showing the front, an extended sleeve and at least part of the underarm. A reverse or interior view also helps. Your task is to map visible pieces and explain how they join. Red ornament may orient you, but does not prove a seam. Make your first sketch without decoration: outline, visible joins and uncertain areas only.
The national culture centre describes long linen women’s shirts with tunic construction and shoulder pieces in Aukštaitija. This is a regional overview, not a pattern for every surviving shirt. The Universal Lithuanian Encyclopedia additionally explains rectangular body lengths, shoulder pieces and square underarm inserts. These sources support terminology; measurements must come from examination of the particular garment.
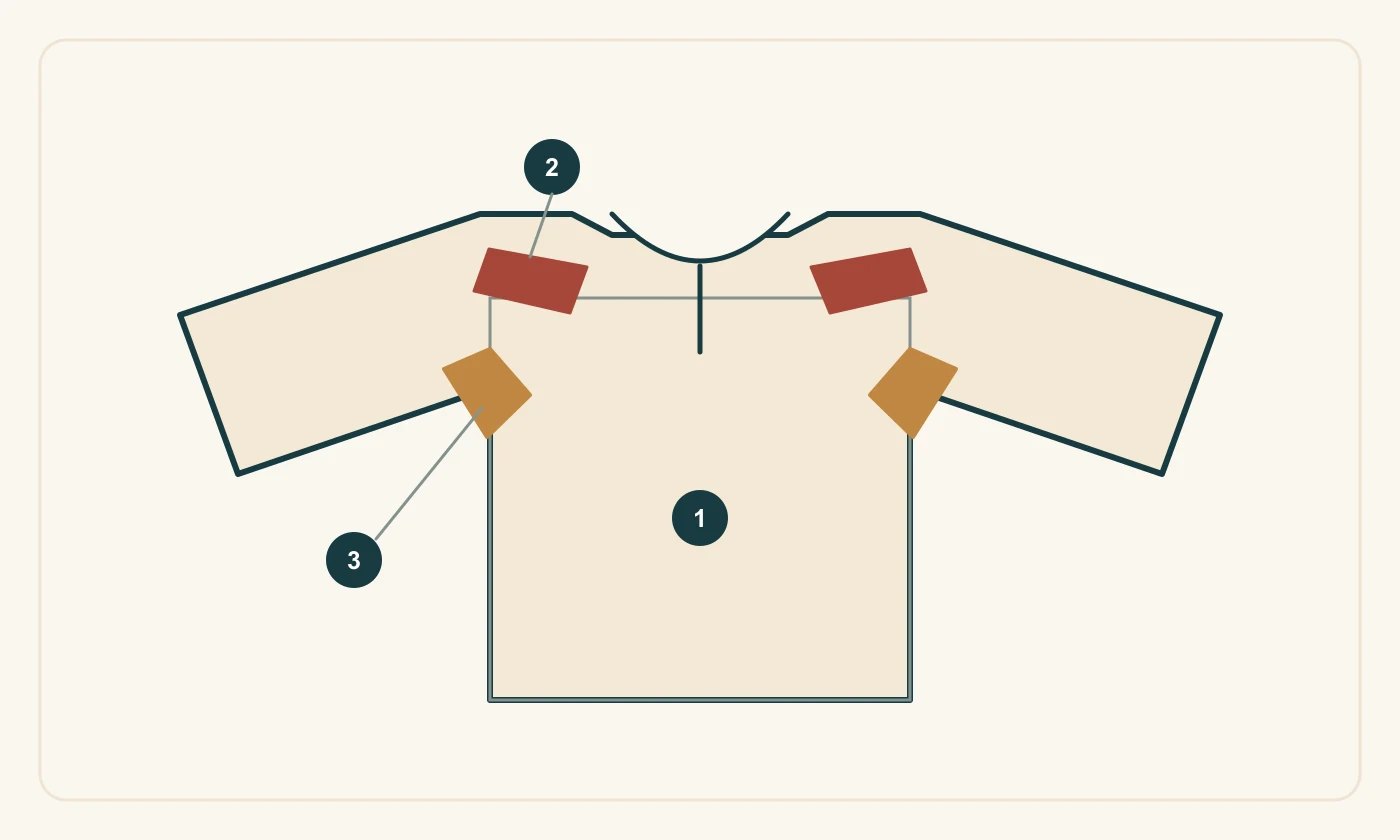
Diagram 1 marks the body, 2 the shoulder-piece area and 3 the underarm-gusset location. Colours distinguish functions. Outlines and proportions are educational and cannot establish the pattern or seam layout of a particular museum shirt.
Body: locate the main volume
The body is the main part surrounding the torso. Distinguish it from sleeves, collar and cuffs. Look for grain direction, a shoulder fold or join, side seams and hem treatment. If a seam is hidden beneath a bodice, do not infer its position simply because it appears in our diagram. Record which additional photograph would resolve the question.
For a paper exercise, fold a rectangle across its short midline and mark a neck opening at the top. Place sleeve rectangles beside it without attaching them yet. This flat arrangement makes the relationship between pieces visible. Dimensions are deliberately absent: the model teaches construction reading, not cutting cloth to fit a person.
Shoulder pieces: examine the shoulder area
The Lithuanian term perpetės refers to shoulder construction; it should not automatically be applied to every patterned strip on a sleeve. Look for a separate piece’s edge and attachment. Decoration may emphasise the piece or blend into neighbouring ornament. Your description should distinguish an actual fabric component from a decorative band.
Mark the shoulder areas in another colour without assigning a universal size. Compare two documented examples, distinguishing visible boundaries from those known only through the description. Clothing terms can cover different local solutions. Preserve the source’s usage rather than forcing all garments to match one drawing.
Gussets: where movement needs room
An underarm gusset is an additional piece at the sleeve–body junction. Seam intersections or an interior view identify it more reliably than a single front image. The small quadrilateral in our diagram marks this functional location. It does not claim that every historic shirt used an identical piece and is not a cutting template.
Take two loose paper pieces and indicate where their junction lacks area when the sleeve is lifted. Add a small quadrilateral between them. This helps visualise added volume, although paper does not flex like cloth. In a real garment, evaluate the gusset together with sleeve width, seam position and the overall construction.
Complete your construction record
Write a short record in this order: source, views available, body and sleeves, confirmed shoulder and underarm pieces. List decorative areas separately. This avoids assigning a region merely because a shirt has red ornament. Any claim about date or locality should come from the object record, not its resemblance to this model.
Add a question for a maker or curator: which measurement, interior view or construction description is missing? Sewing a reconstruction requires a chosen original, verified dimensions, seam details and a toile. The lesson is useful if, before buying fabric, you can state what evidence is missing and why a beautiful photograph alone is insufficient.